
Please select the appropriate installation guide for your platform:
Installation Guide for Windows:
Download
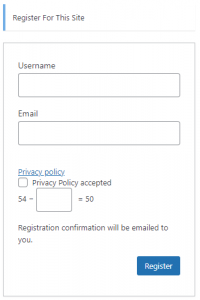
1. Register on our website via the short registration form.
Please enter your company email address when registering. You will receive an email that you need to confirm to complete the registration.
2. Afterwards, in the Download Center, select the Link to the Windows Installer.
3. Start the download of the PDF-Mapper Installer.
Please enter your name and company in the download form and accept the PDF Mapper license terms. After that you can start the download by clicking on "Download Now".
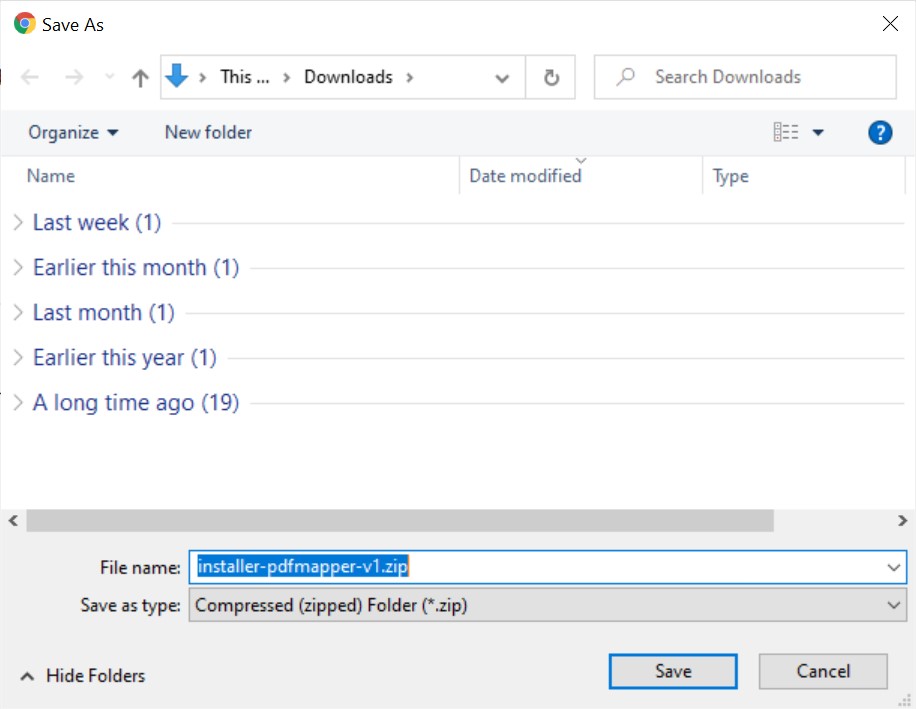
4. Save the installer zip archive locally.
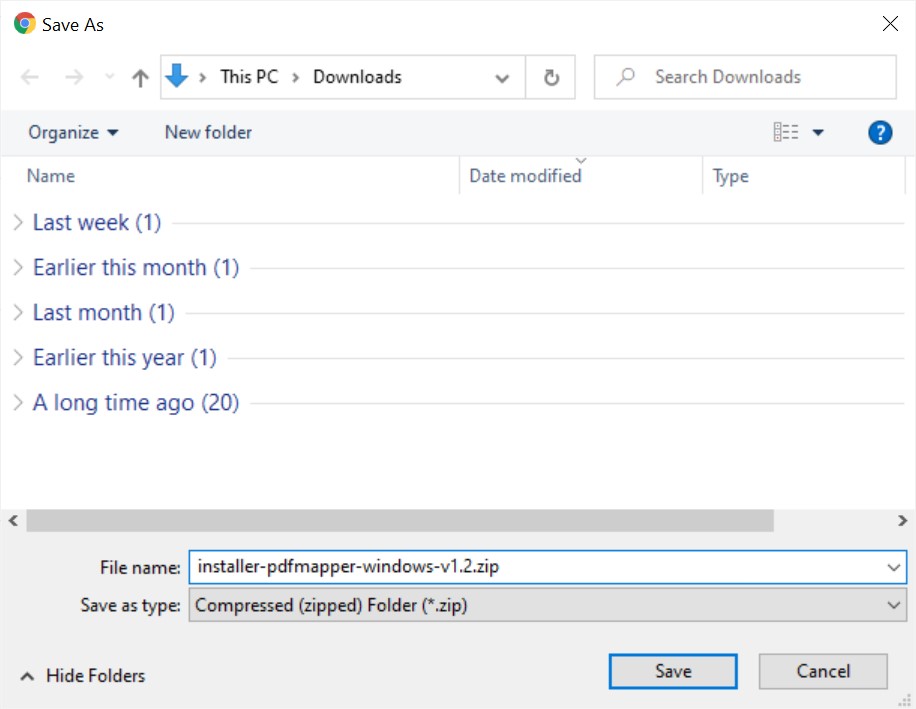
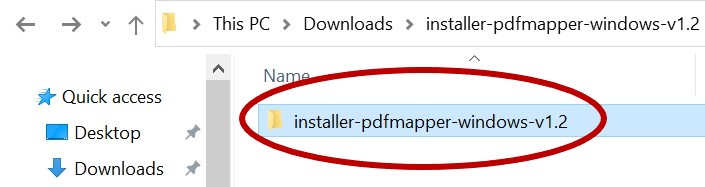
5. In Windows Explorer, navigate to the saved Installer zip archive.
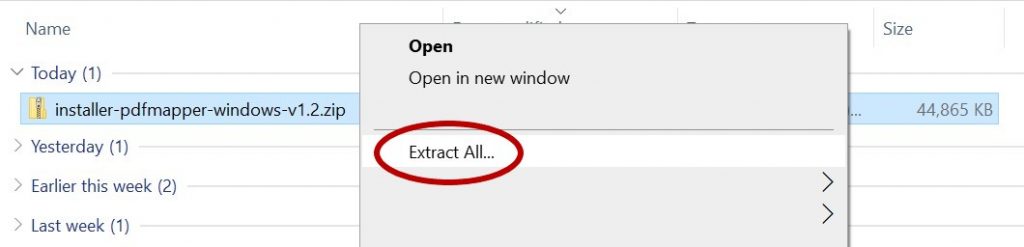
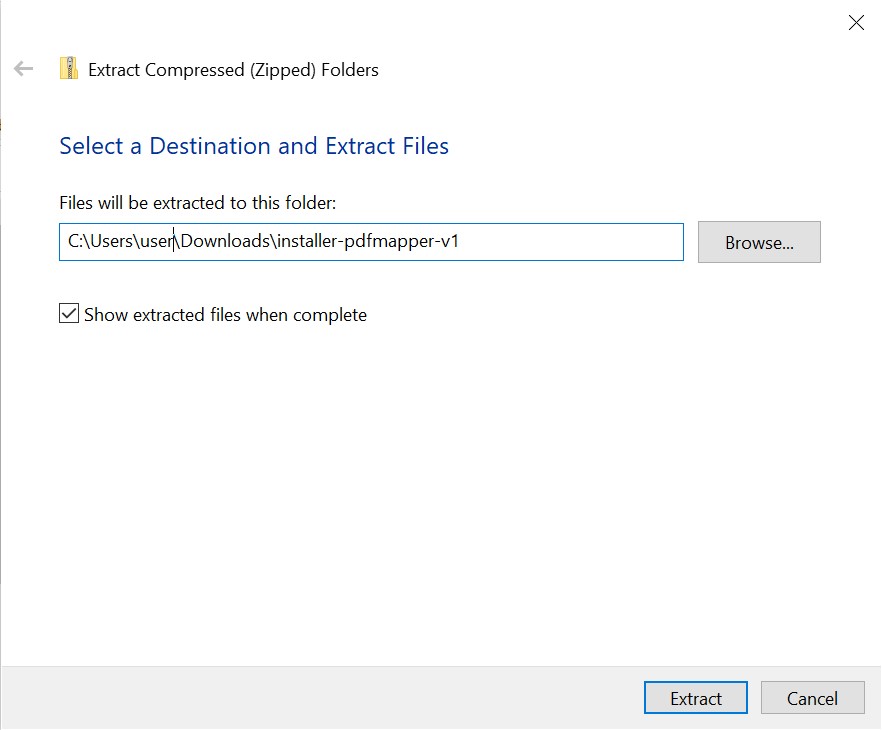
6. Select the entry and choose Extract All with the right mouse button.
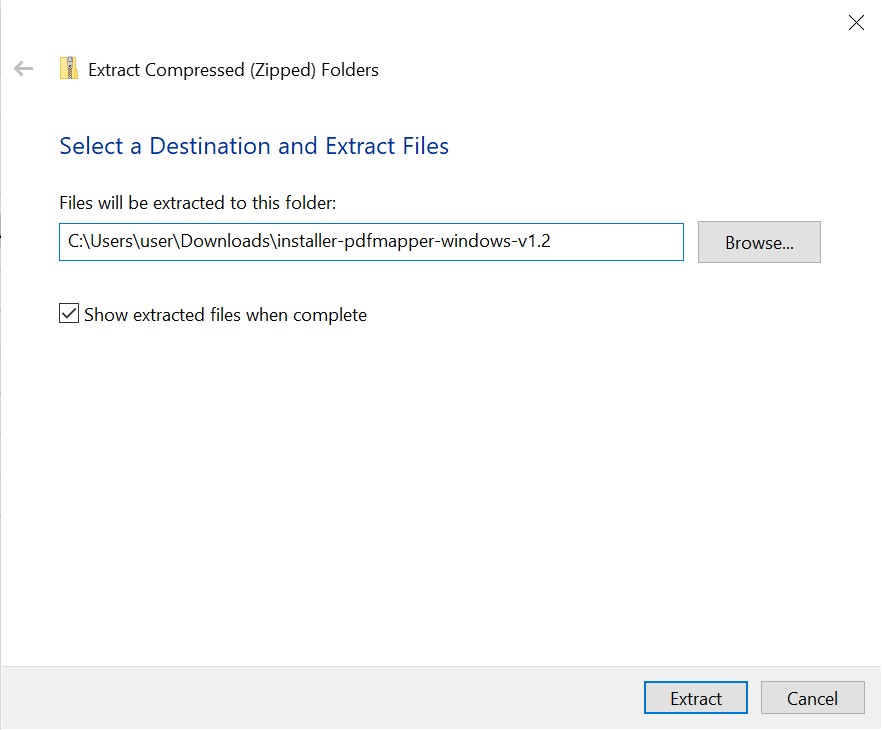
7. Follow the instructions of the wizard and check Show extracted files when complete.
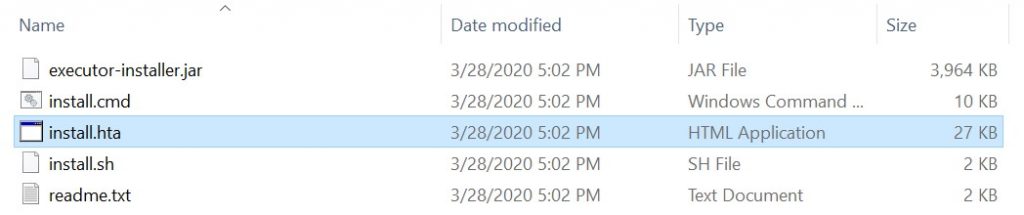
8. Switch to the Windows Explorer window that opened after the extraction.
Installation
Notes on the firewall:
Please note that for the installation and operation of the PDF-Mapper in your firewall https://service.exxtainer.com (84.247.169.11) must be enabled.
To use the support function of the PDF-Mapper, ftp://extranet-c.exxtainer.com (84.247.181.114) must be enabled in your firewall.
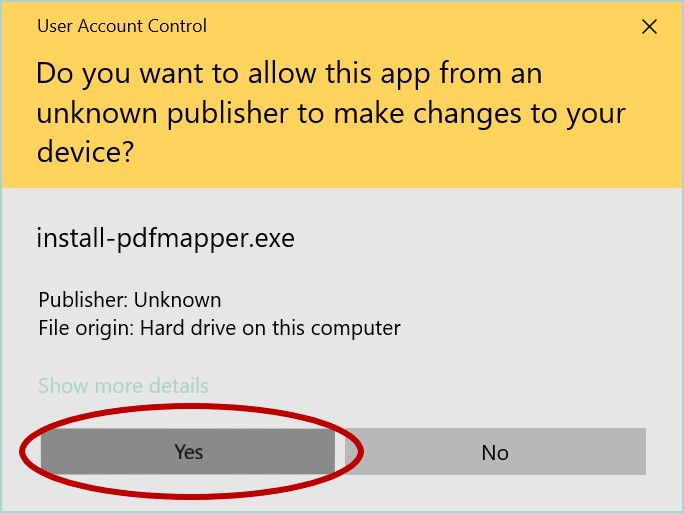
1. Run the installation program install-pdfmapper.exe as administrator.

2. Confirm by clicking on Yes.
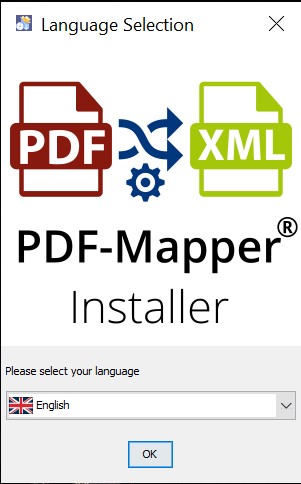
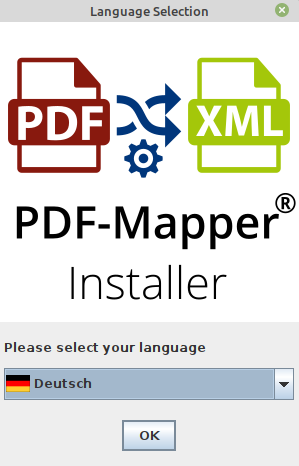
3. Select the preferred language for the installation of the PDF-Mapper.
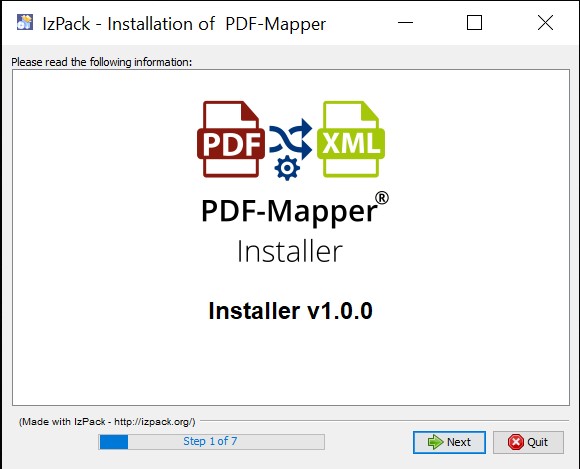
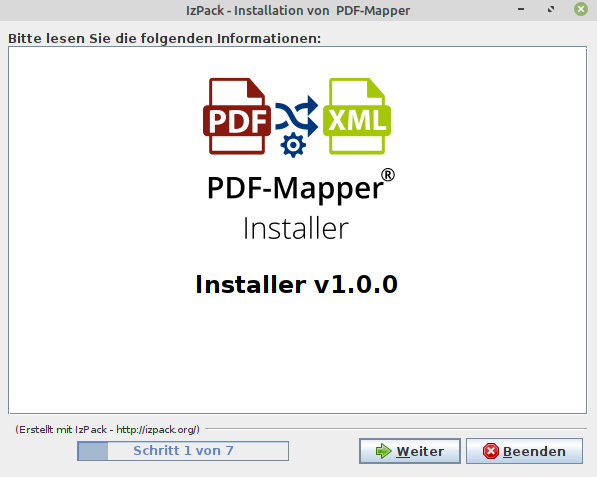
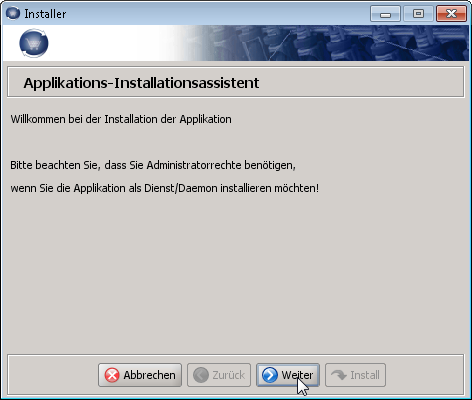
4. Start the installation of the PDF-Mapper by clicking on Next.
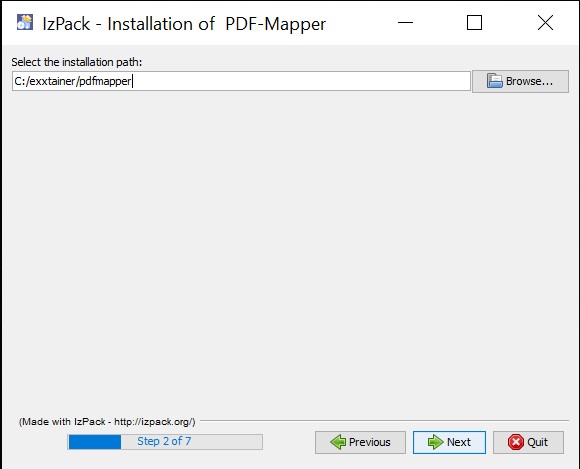
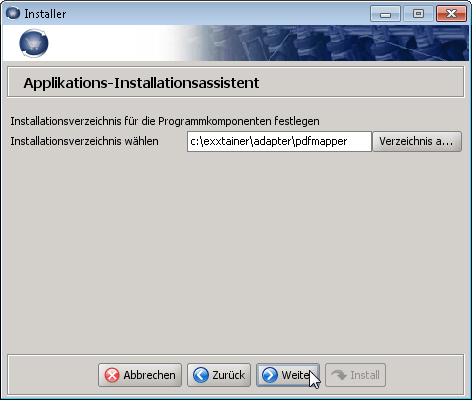
5. Specify the installation directory for the software components.
Please note that the installation into Windows program directories – e.g.C:\Programme,C:\Program FilesorC:\Program Files (x86)– leads to undesired behavior due to access restrictions imposed by Windows. We therefore recommend to keep the default directory.
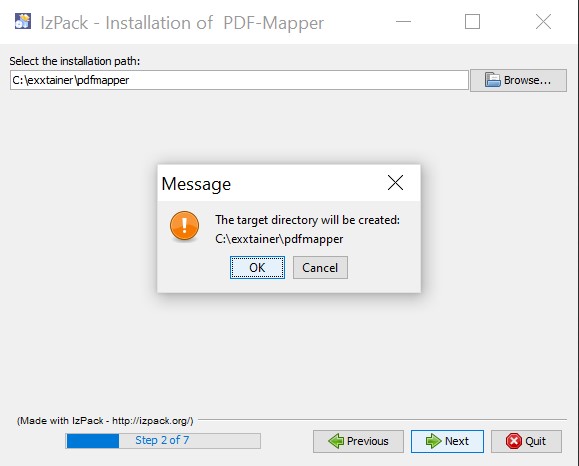
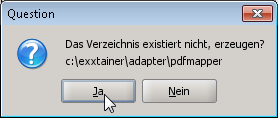
6. If the installation directory for the software components does not yet exist, please confirm with OK.
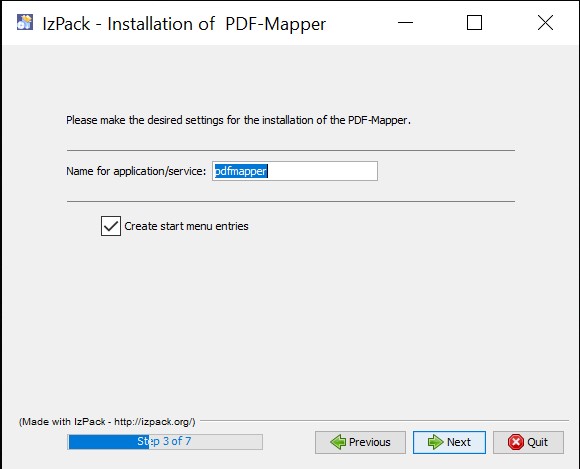
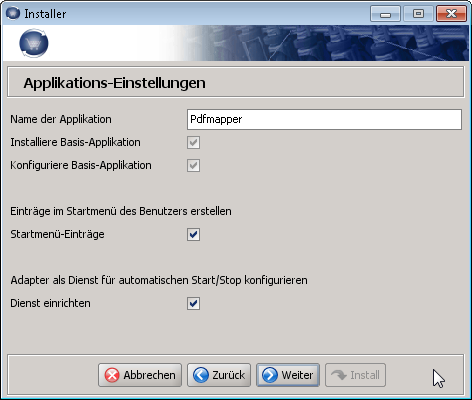
7. Configure the installation settings.
Usually you can leave the default settings as they are.

If you do not want any entries in the Start menu, deactivate the corresponding button (not recommended). The same applies to the setting Set up service.

Note: If you deactivate the option Set up service, you must start the adapter manually via the Start menu entries or via the cmd command files after a system start!
Alternatively, you can use other operating system-specific mechanisms for automatic startup, such as Autostart or Scheduled Task in Windows.
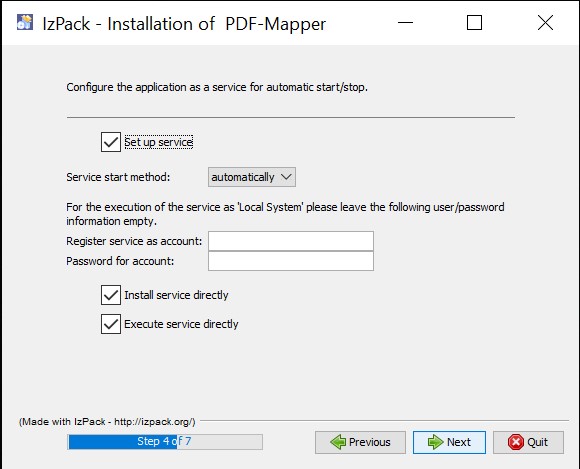
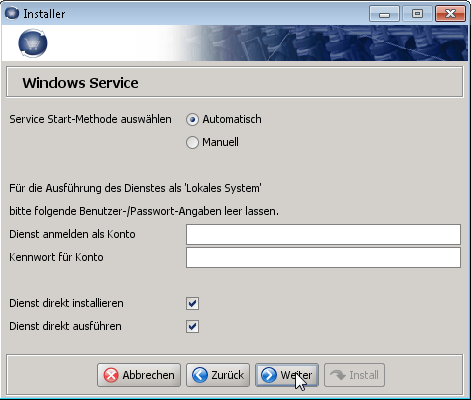
8. If you have enabled Set up service, configure PDF-Mapper as a Windows Service.
We recommend to select the points Install/Execute service directly only on a server machine.

If the service requires special user rights for directory access, enter the corresponding account details. You can change all of the entries made here later in the Windows system dialog to Services.

Note: You can also subsequently manage the services in the Service section of the Start menu.
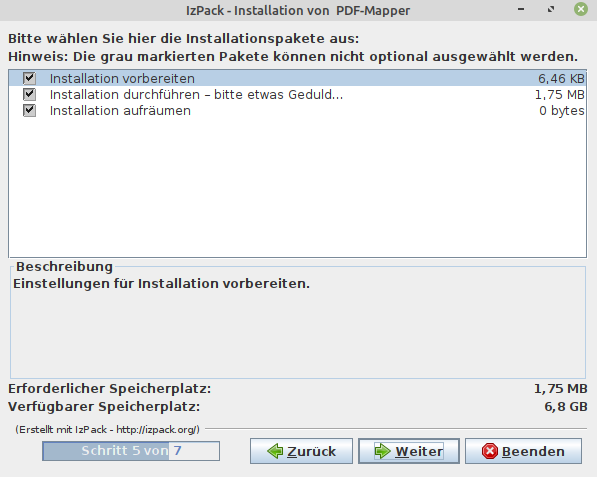
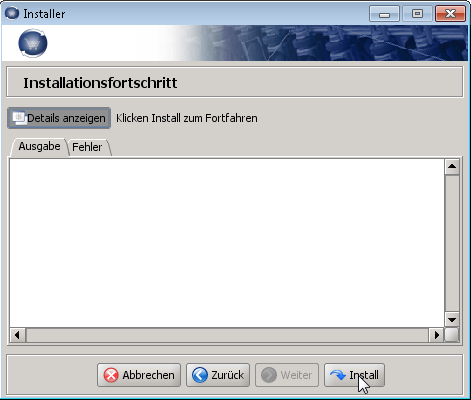
9. To execute the installation, click on Next.
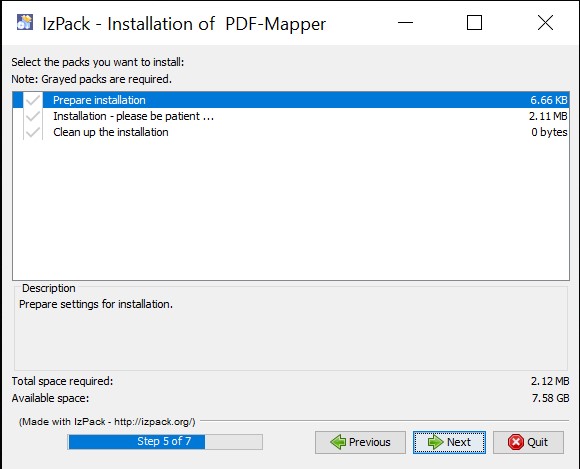
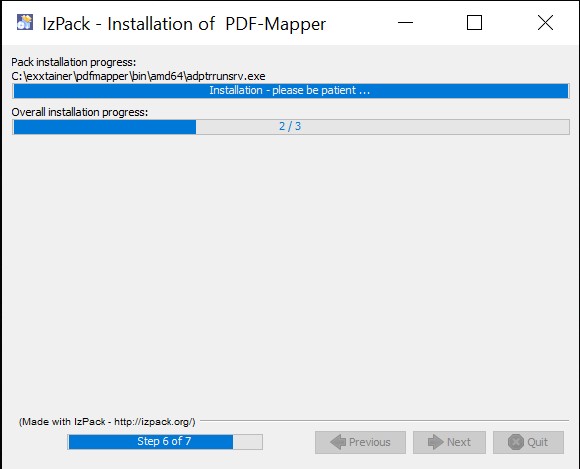
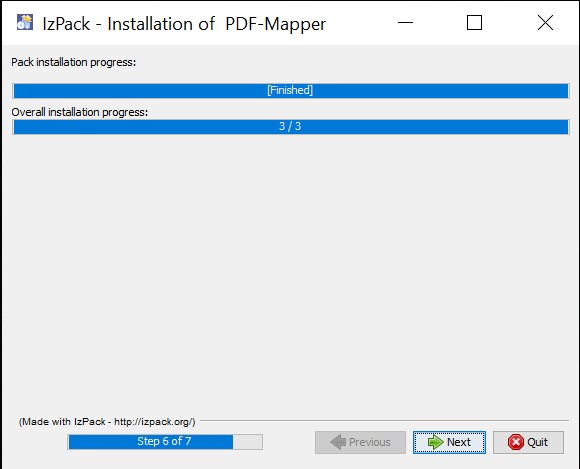
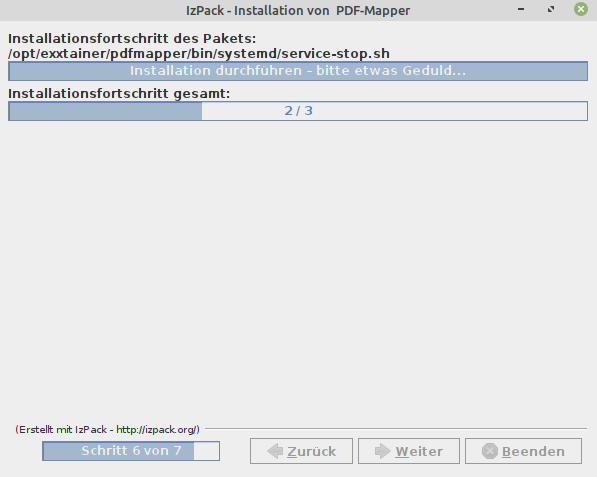
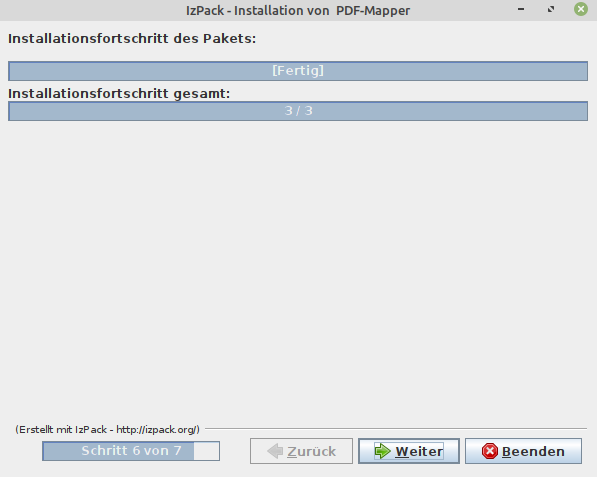
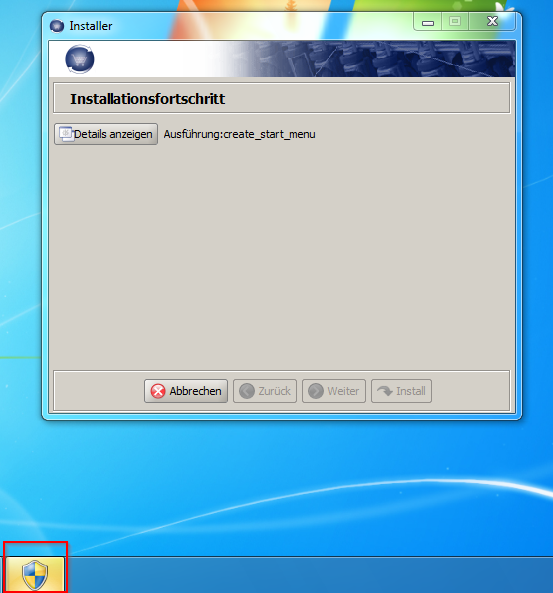
10. The installation progress is displayed. Please be patient while the actions are performed.
11. Then click Next.
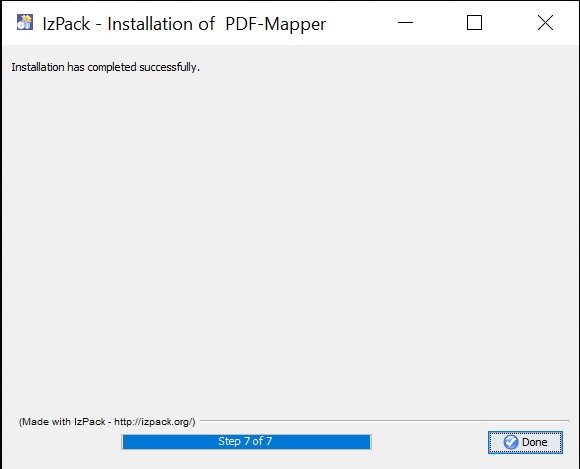
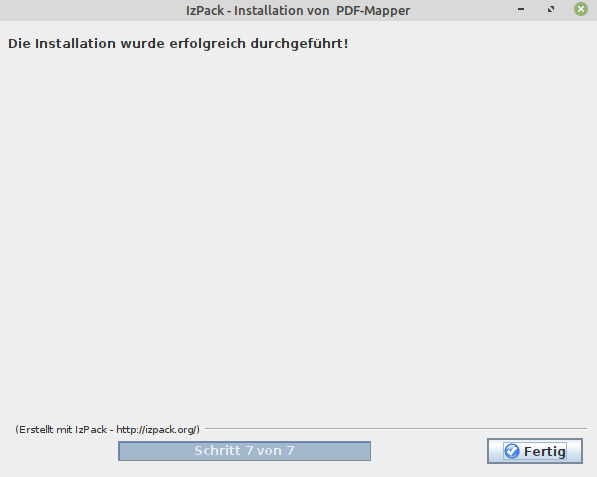
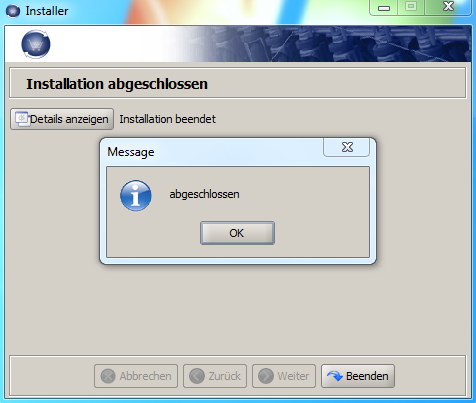
12. Click Done to complete the installation.
Start PDF-Mapper
Notes on PDF-Mapper Service:
If you have selected the default settings Set up service / Execute service directly, the PDF-Mapper Server has already been started. Continue directly with 3. Open PDF-Mapper User Interface in your browser.
1. If you did not execute the PDF-Mapper Service directly, there are two ways to start the PDF-Mapper Server:
a) Start the PDF-Mapper Server in the Windows Start menu by clicking Start Application, if you created the entries in the Start menu during installation.
On Windows with Metro user interface the start menu entries appear under Apps by name.

By clicking Stop application you can stop the PDF-Mapper. In the Service section you can manage the PDF-Mapper Service.
b) Start the PDF-Mapper Server at the saved location by clicking on bin\start-application.cmd .
You can stop the PDF-Mapper Server by clicking on \bin\stop-application.cmd .

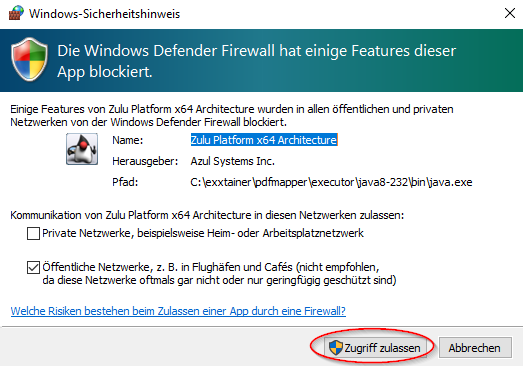
2. When the PDF-Mapper Server is started for the first time, it is possible that a dialog of the Windows firewall appears. Select the appropriate network type and allow access (Allow access button).
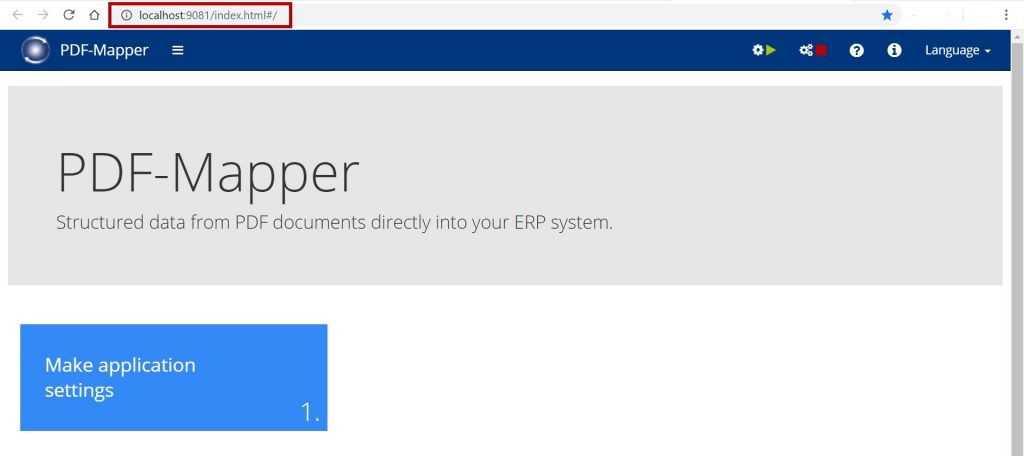
3. Open PDF-Mapper User Interface in your browser.
The PDF-Mapper Server normally cannot open the user interface automatically for security reasons. For the PDF-Mapper User Interface, launch your web browser and select the pre-set URL http://localhost:9081/index.html. We recommend that you save the URL in your browser favorites/bookmarks. When the PDF-Mapper is started for the first time, application packages are still being loaded, so the server may not have started yet and a connection is not yet possible. In this case, please wait a few minutes and then try again. If you want to access the PDF-Mapper User Interface from another computer, simply open the URLhttp://{ip-address-of-pdfmapper-server}:9081/index.html. The firewall must then be configured accordingly. Note: If the default port 9081 is occupied, the PDF-Mapper automatically looks for the next higher free port. If you want to define the ports used by the PDF-Mapper yourself, you can configure this in the fileconf/app.properties. Please observe the notes in the user manual.
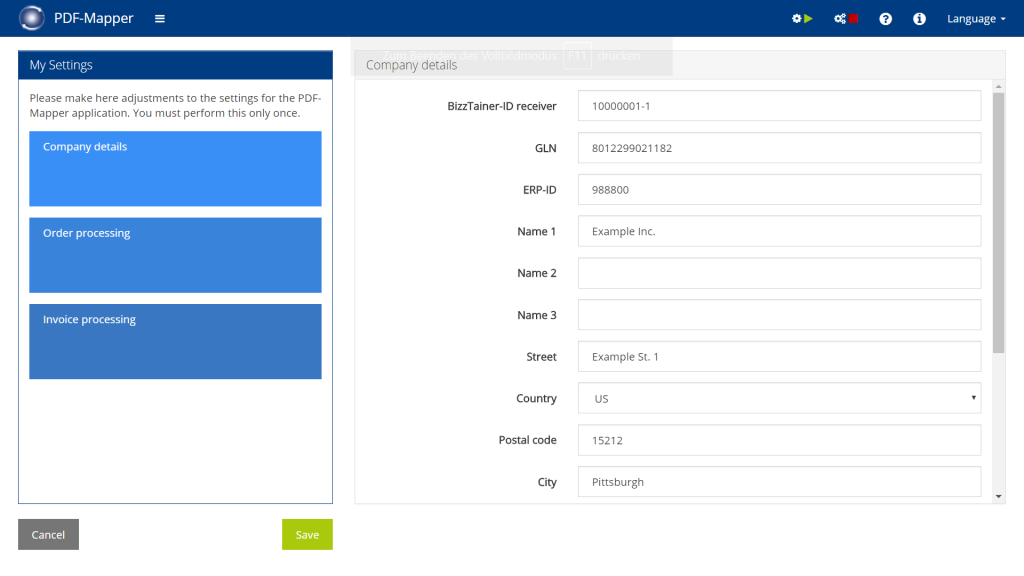
4. When the application is started for the first time, the application settings must be made.
You can change the settings later at any time via the "Make Application Settings" menu item.
5. Enter your company’s details under Company details.
6. Under Configure document types, select the desired message types. The settings for the automatic processing of incoming PDF documents can be made for each selected document type. Confirm your information with Save.
Under Inbox you can specify whether the incoming PDFs are to be fetched from an e-mail box or from a local folder.
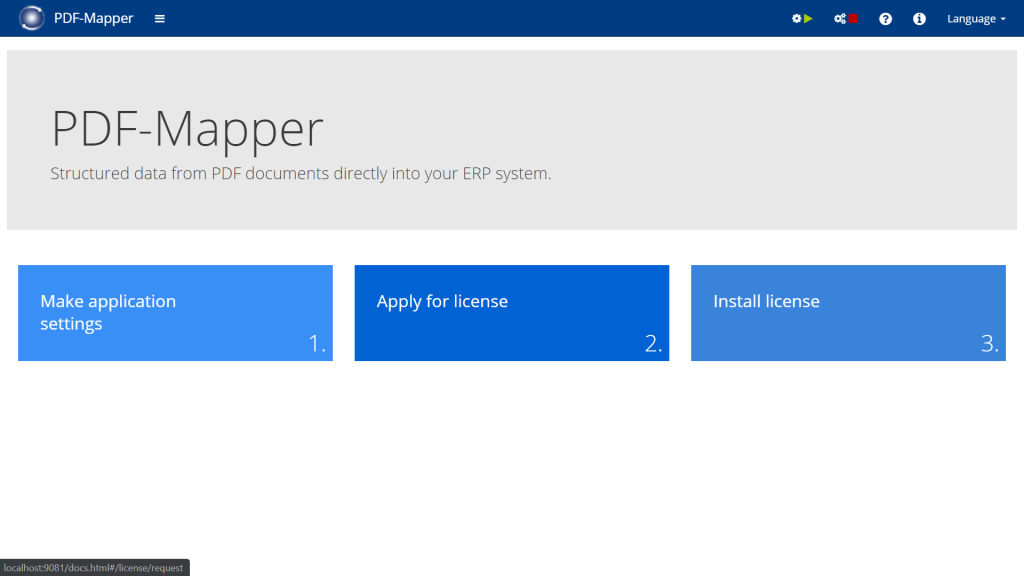
7. Click Apply for license and request your license via the button Apply for license.
The license key and the hardware ID are required to apply for the license. The hardware ID is an identification number of the hardware. Thus, the license key is valid only on the system with matching hardware ID.
7. Apply for your free 30-day trial license or purchase your PDF-Mapper license.
Note: You might have to switch to your language by clicking "Sprache" on the upper right.

Under Desired number of partners you can select the trial license.

Check your information. Specify from when the license should be valid and how many partners are desired. Click Buy license to confirm the purchase or test.

Upon purchase, you will receive an invoice by e-mail (not for the trial license). At the same time you will receive a temporary license, which will be converted into a permanent license after payment is received.
8. You will receive your license by email. Install the license by selecting and uploading that license file.
Enjoy using the PDF-Mapper!
Deinstallation
Select Uninstall Application in the Start menu of the PDF-Mapper and follow the instructions.
Alternatively you can run the uninstall script {pdfmapper-installationspfad}/bin/uninstall.cmd.

Note: The data is permanently deleted and the installation directory of the PDF-Mapper application is removed.
Installation Guide for Linux:
Download
1. Register on our website via the short registration form.
Please enter your company email address when registering. You will receive an email that you need to confirm to complete the registration.
2. Afterwards, in the Download Center, select the Link to the Linux Installer.
3. Start the download of the PDF-Mapper Installer.
Please enter your name and company in the download form and accept the PDF Mapper license terms. After that you can start the download by clicking on "Download Now".
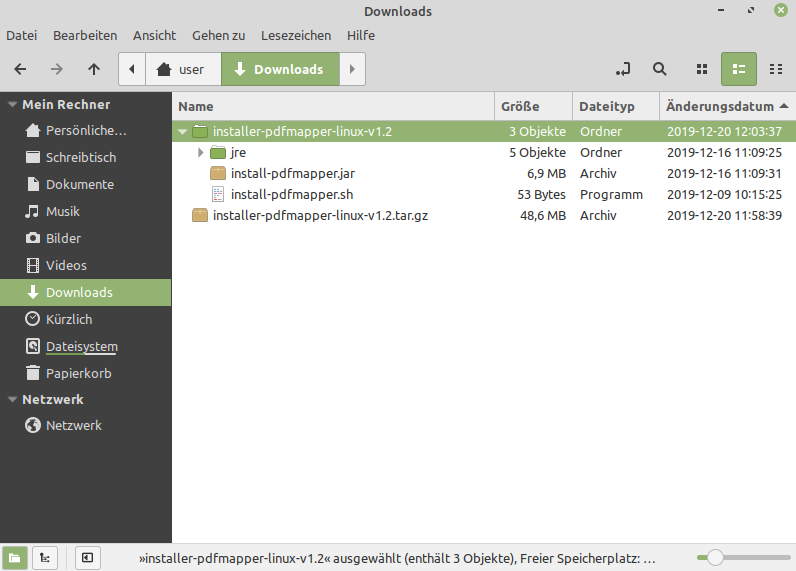
4. Save the installer tar archive locally.
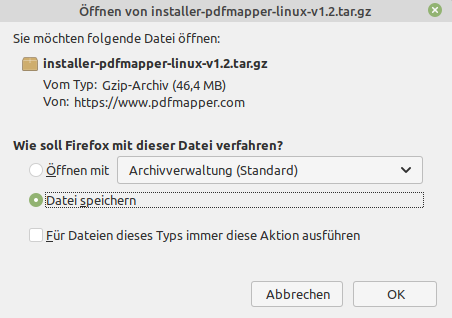
5. In File Explorer, navigate to the saved installer tar archive.
6. Select the entry and choose Extract here with the right mouse button.
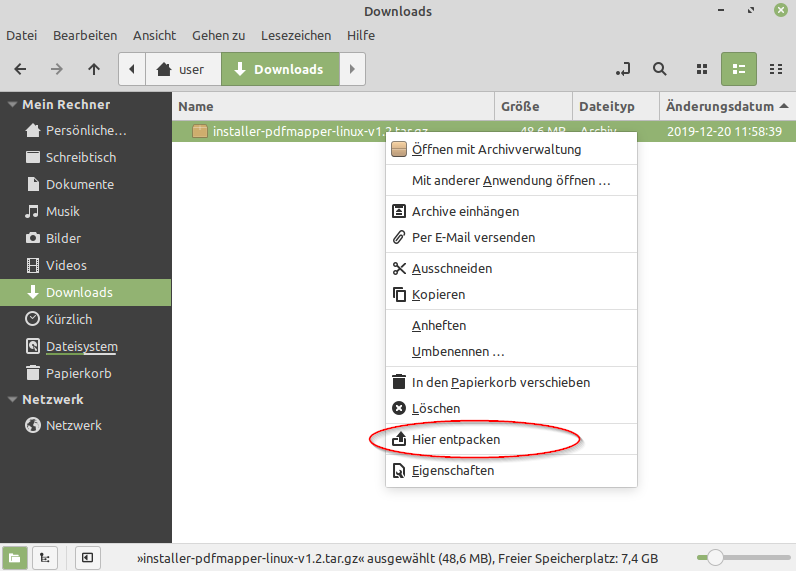
7. The data of the archive is unpacked into the directory installer-pdfmapper-linux-v1.2.
Installation
Notes on the firewall:
Please note that for the installation and operation of the PDF-Mapper in your firewall https://service.exxtainer.com (84.247.169.11) must be enabled.
To use the support function of the PDF-Mapper, ftp://extranet-c.exxtainer.com (84.247.181.114) must be enabled in your firewall.
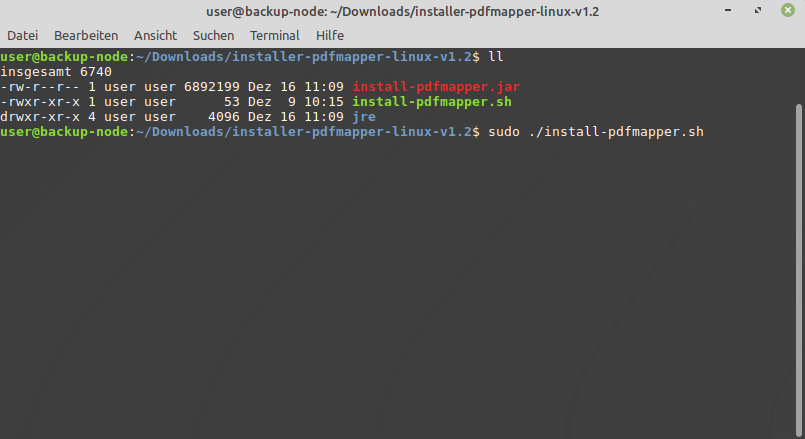
1. Open a terminal and in the console go to the directory installer-pdfmapper-linux-v1.2 with the extracted data.
2. Run the installation program with sudo ./install-pdfmapper.sh as administrator.
Note: You need administrator/root rights for the installation.

The installer also works on a Linux system without graphical user interface (headless). The settings are then done text-based in the console.
3. Select the preferred language for the installation of the PDF-Mapper.
4. Start the installation of the PDF-Mapper by clicking on Next.
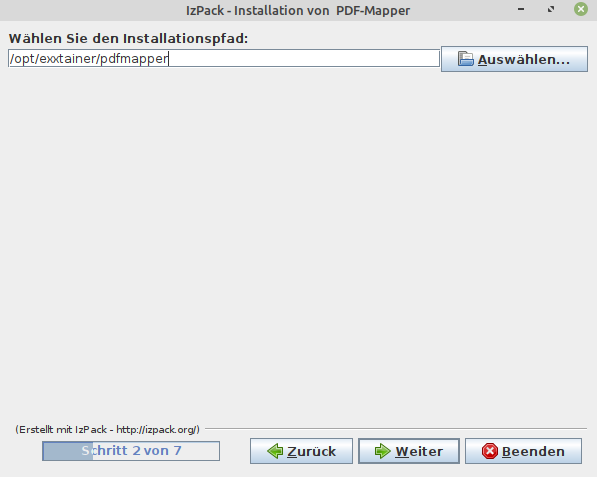
5. Specify the installation directory for the software components.
By default, the installation is in the /opt directory, which is intended for the manual installation of programs that bring their own libraries and are not part of the Linux distribution.

Thus, we recommend to keep the default directory.
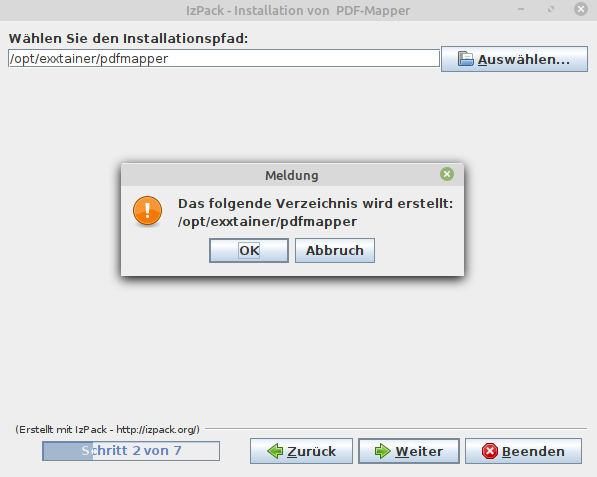
6. If the installation directory for the software components does not yet exist, please confirm with Yes.
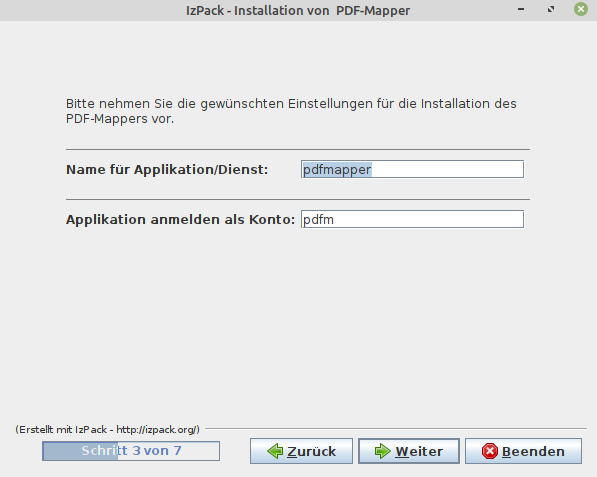
7. Specify the Application Settings.
Choose a name for the application or service, pdfmapper is the default.

The PDF-Mapper Application is set up and operated under one account/user. Choose a new account name here or use an existing user.
If the account does not yet exist, it will be set up with minimal permissions and without shell access.

Note: For security reasons, never use the root user!
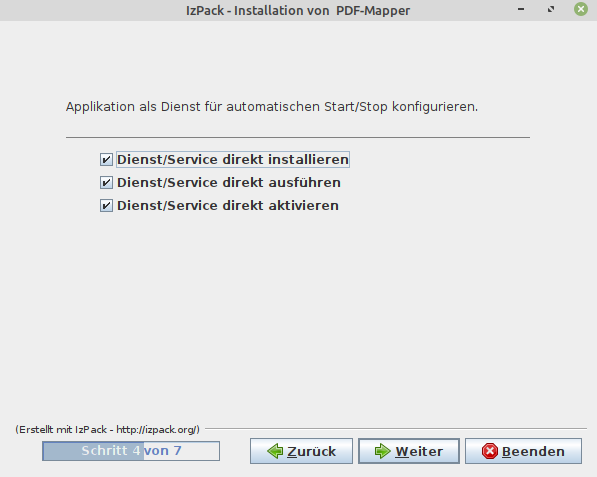
8. Perform configuration for the Systemd Service.
If the item Install Service directly is selected, the configuration for the Systemd-Service is performed. Execute service directly starts the service (systemctl start {appname}.service) and Activate service directly configures the service for autostart after a reboot (systemctl enable {appname}.service) . Note: The Systemd scripts can be found in the directory{pdfmapper-installationspfad}/bin/systemd. On Linux systems without systemd you can control the PDF-Mapper via{pdfmapper-installationspfad}/bin/application.sh {start|stop|restart|status}.
9. To execute the installation, click on Next.
10. The installation progress is displayed. Please be patient while the actions are performed.
11. Then click Next.
12. Click Done to complete.
Start PDF-Mapper
Notes on PDF-Mapper Service:
If you have selected the default setting Execute Service Directly, the PDF-Mapper Server has already been started. Otherwise start the PDF-Mapper Server via {pdfmapper-installation-path}/bin/application.sh start.
1. After starting the PDF-Mapper Server, open the PDF-Mapper User Interface in your browser.
The PDF-Mapper Server normally cannot open the user interface automatically for security reasons. For the PDF-Mapper User Interface, launch your web browser and select the pre-set URL http://localhost:9081/index.html. We recommend that you save the URL in your browser favorites/bookmarks. When the PDF-Mapper is started for the first time, application packages are still being loaded, so the server may not have started yet and a connection is not yet possible. In this case, please wait a few minutes and then try again. If you want to access the PDF-Mapper User Interface from another computer, simply open the URLhttp://{ip-address-of-pdfmapper-server}:9081/index.html. The firewall must then be configured accordingly. Note: If the default port 9081 is occupied, the PDF-Mapper automatically looks for the next higher free port. If you want to define the ports used by the PDF-Mapper yourself, you can configure this in the fileconf/app.properties. Please observe the notes in the user manual.
2. When the application is started for the first time, the application settings must be made.
You can change the settings later at any time via the "Application Settings" menu item.
3. Enter your company’s details under Company details.
4. Under Configure document types, select the desired message types. The settings for the automatic processing of incoming PDF documents can be made for each selected document type. Confirm your information with Save.
Under Inbox you can specify whether the incoming PDFs are to be fetched from an e-mail box or from a local folder.
5. Click Apply for license and request your license via the button Apply for license.
The license key and the hardware ID are required to apply for the license. The hardware ID is an identification number of the hardware. Thus, the license key is valid only on the system with matching hardware ID.
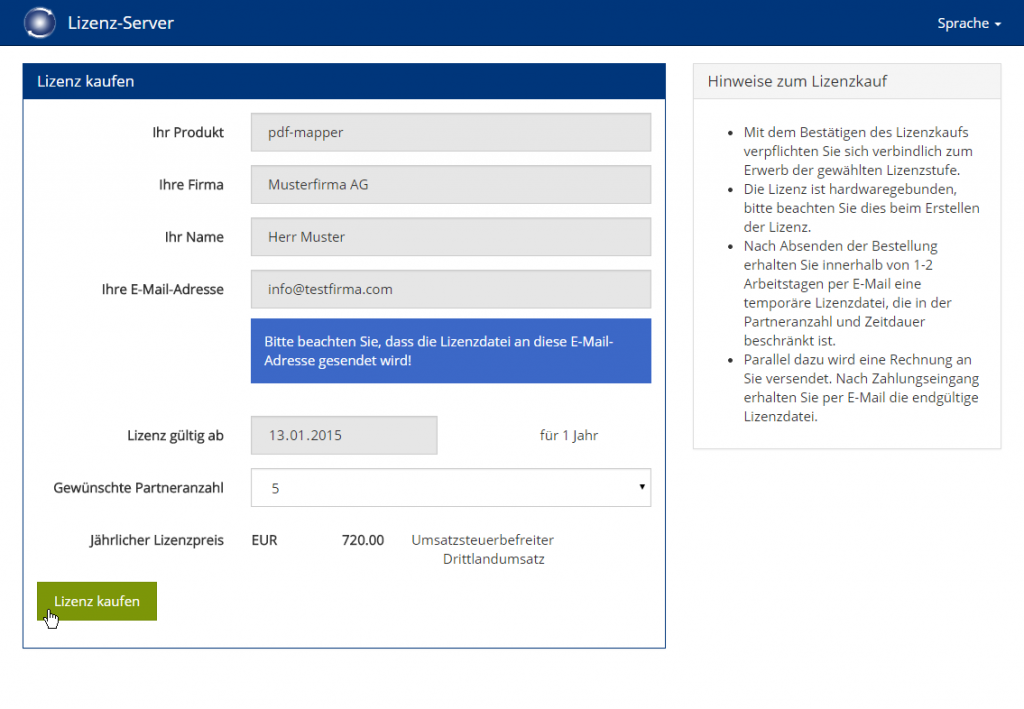
6. Apply for your free 30-day trial license or purchase your PDF-Mapper license.
Note: You might have to switch to your language by clicking "Sprache" on the upper right.

Under Desired number of partners you can select the trial license.

Check your information. Specify from when the license should be valid and how many partners are desired. Click Buy license to confirm the purchase or test.

Upon purchase, you will receive an invoice by e-mail (not for the trial license). At the same time you will receive a temporary license, which will be converted into a permanent license after payment is received.
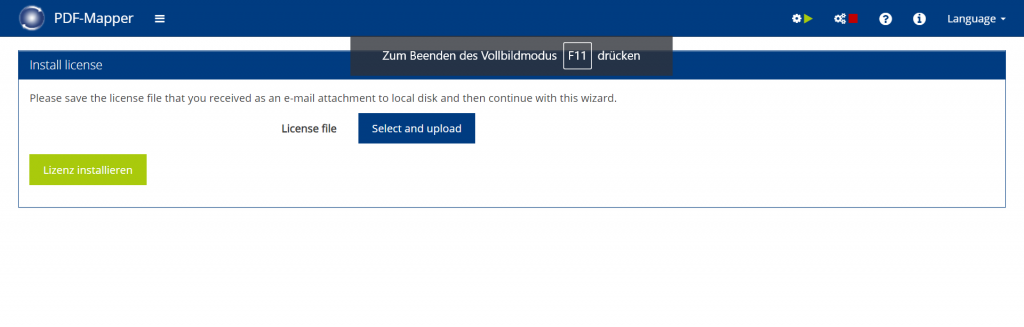
7. You will receive your license by email. Install the license by selecting and uploading that license file.
Enjoy using the PDF-Mapper!
Deinstallation
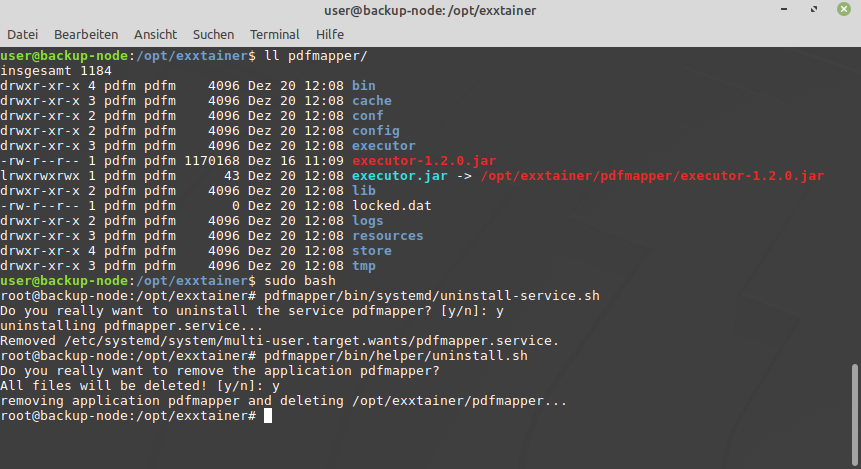
1. Uninstall the Systemd Service with {pdfmapper-installationspfad}/bin/systemd/uninstall-service.sh.
Note: This is only necessary if you have set up the system service during installation.
2. Remove all installation files of the PDF-Mapper with {pdfmapper-installationspfad}/bin/helper/uninstall.sh
Note: The data is permanently deleted and the installation directory of the PDF-Mapper application is removed.
Installation Guide for Advanced Installer:
Download
1. Register on our website via the short registration form.
Please enter your company email address when registering. You will receive an email that you need to confirm to complete the registration.
2. Afterwards, in the Download Center, select the Link to the Advanced Installer for Experts.
3. Start the download of the PDF-Mapper Installer.
Please enter your name and company above and accept the PDF Mapper license terms. After that you can start the download by clicking on "Download Now".
4. Save the installer zip archive locally.
5. In Windows Explorer, navigate to the saved Installer zip archive.
6. Select the entry and choose Extract All with the right mouse button.

7. Follow the instructions of the wizard and check Show extracted files when complete.
8. The next step is to check whether Java is already installed on your system or whether it still needs to be installed. Proceed with the Installation with install.hta or Installation with install.cmd .
Installation with install.hta (Recommended)
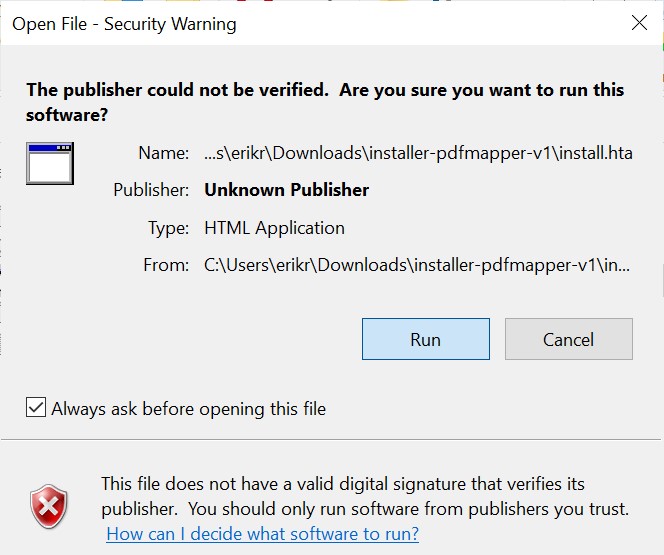
1. In the folder with the extracted files select start install.hta by double clicking.
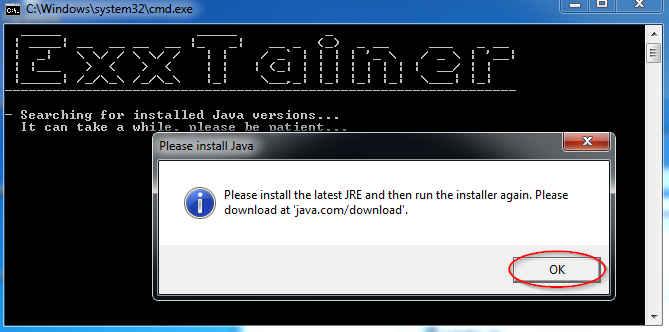
A window opens and the installer searches for Java on your computer. If this is not possible, please continue as described in Installation with install.cmd .
2. Click on Run.
3. A new window opens.
If a Java version is already installed, it is displayed here. Please continue with step 4.

If no Java is installed, this can be done by clicking on the button Download Java. The browser opens on the Oracle page where Java can be downloaded.

If a Java is installed but not found by the installer, this can be done manually. To do this, click on the button Browse and navigate to the Java directory.
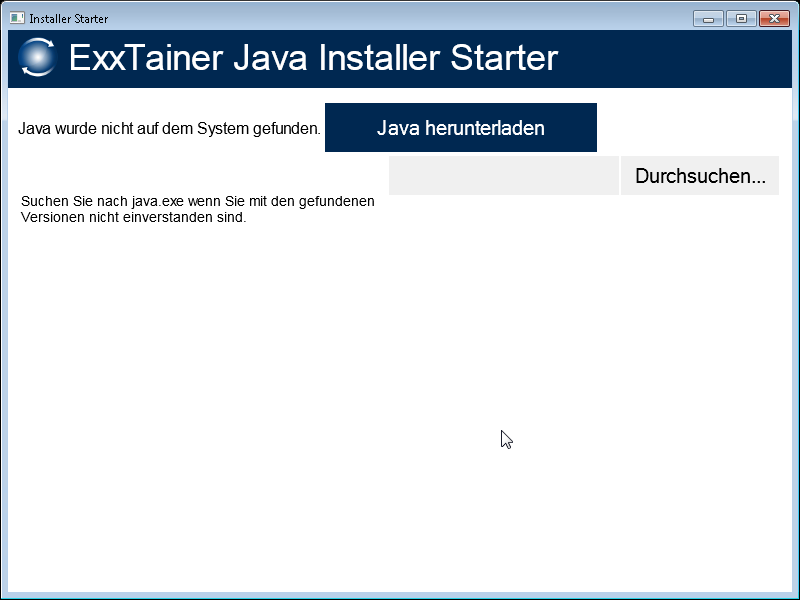
3.a) Please download Java 8 (http://java.com).
Please note the license terms of Oracle for Java 8.

Alternatively, you can also use an OpenJDK. You can find this, for example, at https://www.azul.com/downloads/zulu.

Note: The PDF-Mapper requires Java 8, a higher version such as Java 11 is currently not supported!

3.b) Now change to the download directory, execute the downloaded installation file and follow the instructions of the Java installer.
3.c) If Java has been installed, run the installer.hta file again (see step 1 in this section).

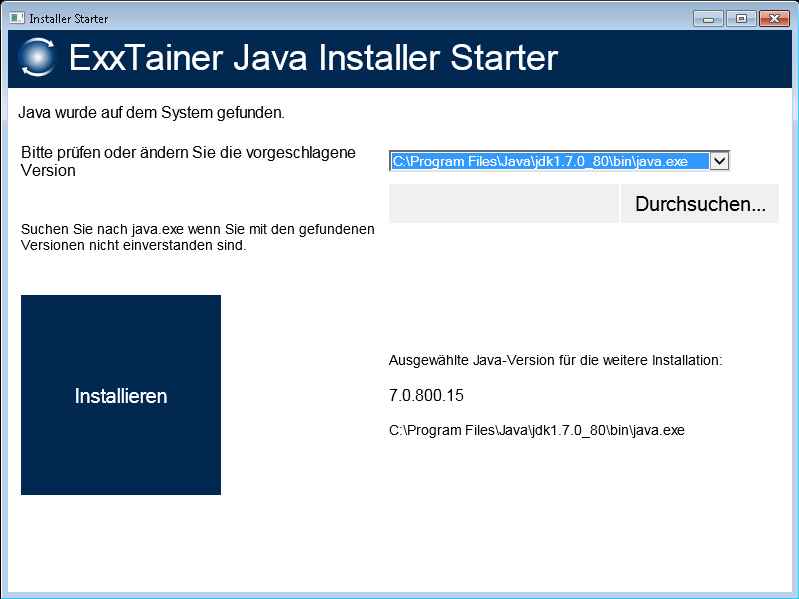
4. Here you can see all installed and found Java versions.
Select the desired version 8 and click on the Install button.

Alternatively, you can use the Browse button to use other Java-8 installations available on your system.
5. Now proceed with the Installation of PDF-Mapper.
Installation with install.cmd (Not recommended)
1. In the folder with the extracted files start install.cmd by double clicking.
A console window opens and the installer searches for Java on your computer.

2. The installer now looks for Java.
If the installer does not find Java, confirm with No and proceed with step 2.a).

If the installer does find Java, proceed with step 3.
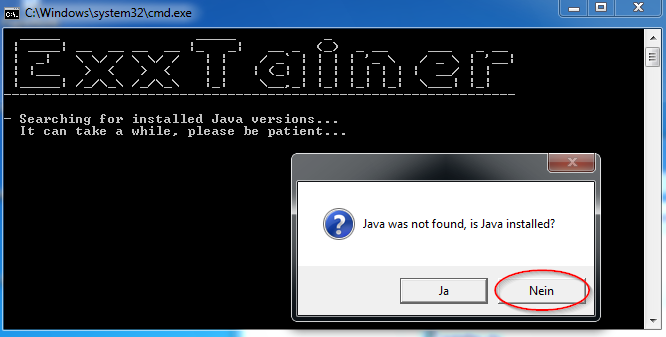
2.a) You will be asked to install Java and then start the installer again.
A click on OK opens your browser with the URL http://java.com/download. Follow the instructions there, install Java and start the installer again.

Please note the license terms of Oracle for Java 8.

Alternatively, you can also use an OpenJDK. You can find this, for example, at https://www.azul.com/downloads/zulu.

In the folder containing the extracted files, start install.cmd again by double-clicking (see step 1 in this section).
3. Now proceed with the Installation of PDF-Mapper.
Installation of PDF-Mapper
Notes on the firewall:
Please note that for the installation and operation of the PDF-Mapper in your firewall https://service.exxtainer.com (84.247.169.11) must be enabled.
To use the support function of the PDF-Mapper, ftp://extranet-c.exxtainer.com (84.247.181.114) must be enabled in your firewall.
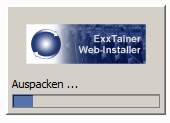
1. The installer unpacks itself and prepares the files for installation.
2. Start the installation of the PDF-Mapper by clicking on Next.
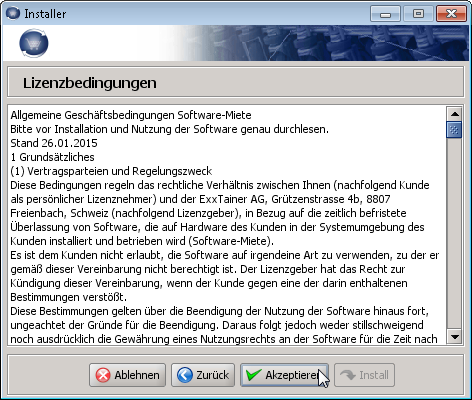
3. Please accept the license terms in order to continue.
4. Specify the installation directory for the PDF-Mapper.
Please note that the installation in Windows program directories – e.g.C:\Programme,C:\Program FilesorC:\Program Files (x86)– leads to undesired behavior due to access restrictions by Windows. Thus, we recommend to keep the default directory.
5. If the installation directory for the PDF-Mapper does not yet exist, please confirm with Yes.
6. Specify the Application Settings.
Usually you can leave the default settings as they are.

If you do not want any entries in the Start menu, deactivate the corresponding button (not recommended). The same applies to the setting Set up service.

Note: If you deactivate the option Set up service, you must start the adapter manually via the Start menu entries or via the cmd command files after a system start! Alternatively, you can use other operating system-specific mechanisms for automatic startup, such as Autostart or Scheduled Task in Windows.
7. If you have enabled Set up service, configure PDF-Mapper as a Windows Service.
We recommend to select the points Install/Execute service directly only on a server machine.

If the service requires special user rights for directory access, enter the corresponding account details. You can change all of the entries made here later in the Windows system dialog to Services.

Note: You can also subsequently manage the services in the Service section of the Start menu.
8. To execute the installation, click Install.
9. During installation, User Account Control dialogs appear in the Windows menu bar. Allow the changes by clicking Yes.
10. To complete, click OK and then click Finish.
PDF-Mapper starten
1. a) Start the PDF-Mapper in the Windows Start menu by clicking Start Application if you created the entries in the Start menu during installation.
On Windows with Metro user interface the start menu entries appear under Apps by name.

By clicking Stop application you can stop the PDF-Mapper. In the Service section you can manage the PDF-Mapper Service.
1. b) Start the PDF-Mapper at the saved location by clicking on start.cmd
A window will open. By closing the window you can stop the PDF-Mapper.
2. When the PDF-Mapper is started for the first time, it is possible that a dialog of the Windows firewall appears. Select the appropriate network type and allow access (Allow access button).
3. Open the PDF-Mapper User Interface in your browser.
The PDF-Mapper Server normally cannot open the user interface automatically for security reasons. For the PDF-Mapper User Interface, launch your web browser and select the pre-set URL http://localhost:9081/index.html. We recommend that you save the URL in your browser favorites/bookmarks. When the PDF-Mapper is started for the first time, application packages are still being loaded, so the server may not have started yet and a connection is not yet possible. In this case, please wait a few minutes and then try again. If you want to access the PDF-Mapper User Interface from another computer, simply open the URLhttp://{ip-address-of-pdfmapper-server}:9081/index.html. The firewall must then be configured accordingly. Note: If the default port 9081 is occupied, the PDF-Mapper automatically looks for the next higher free port. If you want to define the ports used by the PDF-Mapper yourself, you can configure this in the fileconf/app.properties. Please observe the notes in the user manual.
4. When the application is started for the first time, the application settings must be made.
You can change the settings later at any time via the "Make Application Settings" menu item.
5. Enter your company’s details under Company details.
6. Under Configure document types, select the desired message types. The settings for the automatic processing of incoming PDF documents can be made for each selected document type. Confirm your information with Save.
Under Inbox you can specify whether the incoming PDFs are to be fetched from an e-mail box or from a local folder.
7. Click Apply for license and request your license via the button Apply for license.
The license key and the hardware ID are required to apply for the license. The hardware ID is an identification number of the hardware. Thus, the license key is valid only on the system with matching hardware ID.
7. Apply for your free 30-day trial license or purchase your PDF-Mapper license.
Note: You might have to switch to your language by clicking "Sprache" on the upper right.

Under Desired number of partners you can select the trial license.

Check your information. Specify from when the license should be valid and how many partners are desired. Click Buy license to confirm the purchase or test.

Upon purchase, you will receive an invoice by e-mail (not for the trial license). At the same time you will receive a temporary license, which will be converted into a permanent license after payment is received.
8. You will receive your license by email. Install the license by selecting and uploading that license file.
Enjoy using the PDF-Mapper!
Deinstallation
Select Uninstall Application in the Start menu of the PDF-Mapper and follow the instructions.
Alternatively you can run the uninstall script {pdfmapper-installationspfad}/bin/uninstall.cmd.

Note: The data is permanently deleted and the installation directory of the PDF-Mapper application is removed.
Installation Support:
Tutorials
Check out our tutorials on downloading, installing and setting up PDF-Mapper.
Contact
Do you have a question? Or do you need individual support during installation? Feel free to contact us!